Appetizers
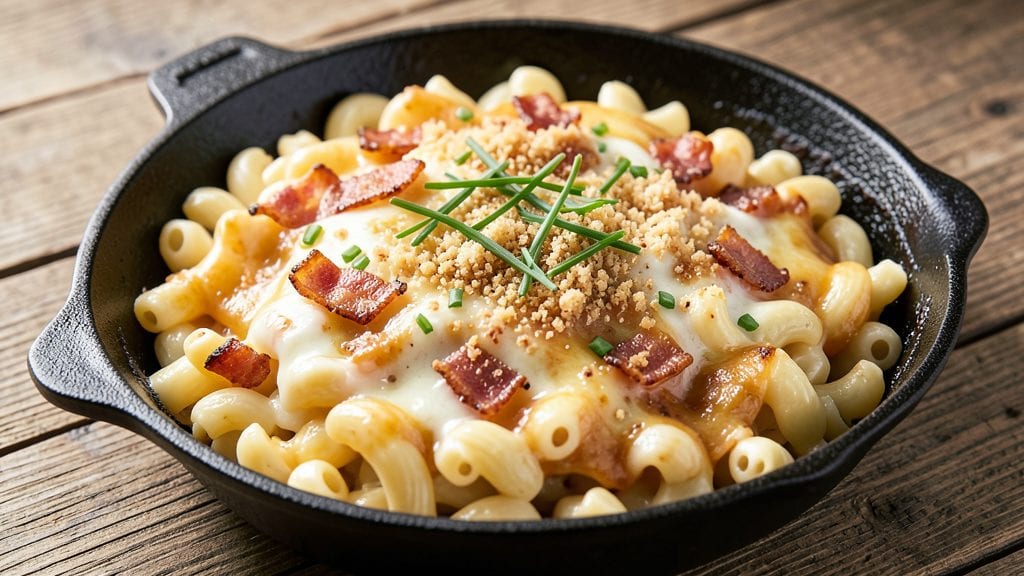
This copycat Outback mac and cheese recipe brings home the restaurant’s creamy, cheesy perfection with a golden breadcrumb crust and rich, velvety sauce. The secret lies in a precise roux and a blend of sharp cheddar that creates the signature tangy richness.
I've perfected this copycat version after years of testing—it's the one dish that always gets rave reviews at dinner parties.
What sets this recipe apart is the one-pan method, where the crispy topping meets the creamy sauce in the same dish. The key steps—making a smooth roux, adding cheese in stages, and baking until golden—ensure every bite delivers that iconic Outback flavor.
No shortcuts here, just a foolproof technique that recreates the dish exactly as you know it.
By the end, you'll have a bubbling pan of mac and cheese with a crispy, golden-brown topping that cracks when you cut into it, revealing layers of melted cheese beneath.
The sauce clings perfectly to each noodle, creating that signature cheesy pull. This isn't just comfort food—it's the kind of dish that transforms a simple weeknight into a memorable meal.
Serve it as a main course with a side salad or grilled chicken, or make it the star of your next game day spread. The leftovers reheat beautifully too, though I can't promise they'll last that long. Let's get cooking—this mac and cheese is worth every minute of effort.
Ingredients for copycat outback mac and cheese
Six ingredients make this iconic mac and cheese—crispy on top, creamy inside, just like Outback.
| Ingredient | Amount | Notes |
|---|---|---|
| Elbow Macaroni 🍝 | 1 ½ lbs | Medium or extra-large size |
| Unsalted Butter 🧈 | ½ cup | Cold, cut into small cubes |
| All-Purpose Flour 🌾 | ½ cup | For smooth roux |
| Sharp White Cheddar Cheese 🧀 | 2 cups | Shredded, block preferred |
| Medium Cheddar Cheese 🧀 | 1 ½ cups | Shredded, block preferred |
| Extra-Sharp White Cheddar Cheese 🧀 | 1 cup | Shredded, for tangy kick |
| Whole Milk 🥛 | 1 ½ cups | Warm for best texture |
| Panko Breadcrumbs 🍞 | ½ cup | For crispy topping |
| Extra-Virgin Olive Oil 🫒 | 2 tbsp | For breadcrumb mix |
| Garlic Powder 🧄 | 1 tsp | For extra flavor |
| Onion Powder 🧅 | 1 tsp | For depth |
| Salt 🧂 | 1 ½ tsp | Adjust to taste |
| Black Pepper 🌶️ | ½ tsp | Freshly ground |
| Butter (for greasing) 🧈 | 2 tbsp | For baking dish |
The cheeses are non-negotiable. Sharp white cheddar gives that signature tang, while medium cheddar adds creaminess. Grab block cheese from the deli counter—pre-shredded gets clumpy. I always buy extra because it keeps for months. For the roux, cold butter and flour are key—cook it low and slow to avoid burning. The Panko breadcrumbs from Trader Joe's give the best texture, but any panko works in a pinch. If you're feeling fancy, toast them lightly in the oven first for extra crunch.
No sharp cheddar? Colby Jack or pepper jack can work, but the flavor won't be exact. Short on milk? Heavy cream or half-and-half makes it richer, but whole milk keeps it classic. The garlic and onion powders are optional but add depth—skip them if you're in a rush. For the breadcrumb topping, olive oil plus a pinch of salt makes it stick better than just butter. Pro tip: mix the breadcrumbs with the spices before adding oil to avoid clumps. If you're serving this to picky eaters, save a few plain breadcrumbs for the top—it looks cleaner.
This mac and cheese reheats like a dream—just cover with foil and warm in the oven for 10-15 minutes. Leftovers keep for 4-5 days in the fridge, though I doubt they'll last that long. For game day or parties, double the batch and bake in two pans. The crispy topping stays perfect if you reheat it covered, then broil for 2-3 minutes at the end to restore the crunch. Store any extra cheese in an airtight container—it's the kind of leftovers you'll actually want to eat again.
Why You'll Love This Recipe
- No-Fuss Roux Magic: I swear by that simple butter-and-flour roux—just melt, whisk, cook until golden. No fancy techniques, no stress, and it’s what gives this mac that actual Outback-level richness without the mystery.
- Cheese Obsession: Sharp white cheddar and medium cheddar together? It’s a flavor bomb—creamy, sharp, and just salty enough to make you crave another bite. The melty pull is chef’s kiss, and I’ve tested this combo a dozen times.
- Lunchbox Legend: This mac reheats like a dream—perfect for packing leftovers (yes, there will be leftovers). My kids take it to school, and honestly? They’d rather eat this than anything else I make for them.
- Budget Stretch: Elbow mac, butter, flour, and a block of cheddar—this feeds four for under $8. I’ll be real: it’s my go-to when I’m broke but still want to feel fancy, and it never disappoints.
Step-by-step instructions for copycat Outback mac and cheese
This one-pan wonder delivers that signature crispy top and creamy center every time.
Cook the Elbow Macaroni Al Dente
Bring a large pot of water to a rolling boil and add the 1.5 lbs elbow macaroni. Stir immediately to prevent sticking. Cook for 11-12 minutes until the pasta is al dente—it should have a slight bite in the center. Drain the pasta in a colander and return it to the pot.
While the pasta cooks, I like to keep a small bowl of the pasta water handy. You'll need about ½ cup later to help create that ultra-smooth sauce. Don't rinse the pasta—those surface starches are what help thicken the cheese sauce later.
Make the Creamy Cheese Sauce
In a large oven-safe skillet (I use a 10-inch cast iron), melt the ½ cup unsalted butter over medium heat. Once it's fully melted and foaming, whisk in the ½ cup all-purpose flour to form a roux. Cook for 2-3 minutes until the mixture turns a pale golden color and smells nutty.
Slowly pour in the 1.5 cups warm whole milk while whisking constantly to prevent lumps. Bring the mixture to a gentle simmer and cook for 3-4 minutes until it thickens slightly. Now it's time for the cheese—add the 2 cups sharp white cheddar cheese, 1.5 cups medium cheddar cheese, and 1 cup extra-sharp white cheddar cheese all at once. Stir vigorously until completely melted and smooth.
Combine Pasta and Sauce
Add the drained elbow macaroni to the skillet and toss gently to coat every strand with the creamy cheese sauce. Stir in the 1 tsp garlic powder, 1 tsp onion powder, 1.5 tsp salt, and ½ tsp black pepper. Taste and adjust seasoning if needed—this is where you can really make it your own.
Here's the thing—I like to let the mixture sit for 2-3 minutes off the heat. This gives the cheese time to fully meld with the pasta and creates that signature Outback texture. The sauce should be thick enough to coat the back of a spoon but still have a slight sheen.
Create the Crispy Topping
Preheat your oven to 375°F. While it's heating, prepare the topping by mixing the ½ cup panko breadcrumbs with 2 tbsp extra-virgin olive oil in a small bowl. Spread this mixture evenly over the top of the mac and cheese, pressing down gently to help it stick.
Transfer the skillet to the preheated oven and bake for 15-20 minutes until the topping is deep golden brown and the edges are bubbling. The key here is patience—don't peek! Every time you open the oven, you lose heat and steam, which can prevent that perfect crispy crust from forming.
Broil for Maximum Crispiness
Switch your oven to broil and continue cooking for 2-3 minutes until the topping is deeply golden and almost caramelized in spots. Watch it closely—broilers can vary, and you want that beautiful contrast of crispy top and creamy center.
Let the mac and cheese rest for 5 minutes before serving. This resting time is crucial—it allows the cheese to set slightly and makes it easier to serve without losing that perfect sauce-to-pasta ratio. Serve immediately with a side of steamed broccoli or a simple green salad for the full Outback experience.
Pro Tips For Making Copycat Outback Mac And Cheese
- Cook pasta al dente: The Outback version relies on elbow macaroni that’s just tender—not mushy. I used to overcook it, thinking it’d absorb more cheese sauce, but that’s a myth. Pull it out when it still has a tiny bite, then finish cooking in the sauce. Trust me, the texture’s everything here.
- Whisk flour fast: After melting the butter, dump in the flour all at once and whisk like you’re trying to win a race. I learned this the hard way—lumpy roux = grainy sauce. Keep it moving for 2 full minutes until it’s smooth and golden. No shortcuts here.
- Grate cheese fresh: Pre-shredded cheese has anti-caking agents that make the sauce look dry and clumpy. Grab a box of sharp white cheddar and medium cheddar, then grate them yourself. It’s a little more work, but the result is a sauce that’s creamy and melts like a dream.
- Temper the cheese: Don’t just dump cold cheese into the hot sauce—it’ll seize up and turn grainy. Lower the heat to medium-low, then slowly stir in the cheese a handful at a time. Let each batch melt completely before adding more. Patience here keeps the sauce velvety.
Pro cooking tips for perfect results
Roux Perfection
The roux is the foundation of that velvety sauce, so handle it with care. Cook the ½ cup cold butter and ½ cup flour over medium heat for exactly 2-3 minutes—no more, or you'll risk burning. Stir constantly with a wooden spoon or whisk to avoid lumps.
The moment it turns a pale golden color and smells nutty, you're golden. I use a 10-inch cast iron skillet because it retains heat well and prevents scorching. 🌡️
Cheese Melting Magic
Add all the cheese at once and stir vigorously until completely melted. If the sauce looks too thick, add 1-2 tablespoons of warm pasta water to loosen it. The key is patience—let it sit off the heat for 2-3 minutes so the flavors meld.
I like to taste it here and adjust seasoning before adding the pasta. This is where the sharp white cheddar shines—its tang cuts through the richness. 🧀
Pasta Water Secret
Save ½ cup of starchy pasta water—it's liquid gold for this recipe. If your sauce gets too thick after adding the cheese, thin it with 1-2 tablespoons of that pasta water.
The starch in the water helps create that signature smooth, clingy texture that coats every noodle perfectly. Never rinse your pasta—those surface starches are essential for the sauce's body. 💡
Breadcrumb Crust Tips
For the ultimate crispy topping, mix panko breadcrumbs with olive oil and a pinch of salt before spreading. Press them gently into the cheese sauce to help them stick. I like to toast the panko in the oven for 2-3 minutes before mixing with oil for extra crunch.
Don't skip the broil at the end—it adds that deep golden color and caramelized flavor that makes this dish restaurant-quality. 🍞
Oven Temperature Control
Set your oven to 375°F and bake for 15-20 minutes without opening the door. Peeking releases steam and can prevent that perfect crispy crust from forming. If your oven runs hot, reduce the temperature to 350°F and bake for 22-25 minutes.
The goal is a deep golden brown topping with bubbling edges underneath. 🔥
Resting Matters
Let the mac and cheese rest for 5 minutes before serving. This resting time allows the cheese to set slightly and prevents a messy slide when scooping. The sauce will thicken just enough to hold its shape, making it easier to serve family-style.
I often serve it straight from the skillet for that restaurant-style presentation. ✨
Nutrition facts
Frequently asked questions
Why does the Outback version use three different cheddar cheeses?
The mix of sharp white cheddar, medium cheddar, and extra-sharp white cheddar creates the signature tangy yet creamy flavor. The sharp cheddars add depth, while the medium provides smoothness. Pre-shredded cheese won't work—always shred your own from blocks for the best texture.
Can I make this mac and cheese ahead of time?
Assemble the dish (without baking) up to 24 hours ahead and refrigerate. When ready to bake, add the breadcrumb topping and bake at 375°F for 25-30 minutes—cover with foil for the first 20 minutes to prevent over-browning. The texture will be perfect after reheating.
What’s the best way to reheat leftovers?
Cover with foil and warm in the oven at 350°F for 10-15 minutes. For extra crunch, broil for 2-3 minutes at the end. Microwaving works in a pinch, but the topping gets soggy. Leftovers keep for 4-5 days in an airtight container.
Can I substitute regular breadcrumbs for panko?
While panko gives the best texture, regular breadcrumbs will work if that’s all you have. For extra crunch, toast them in the oven for 3-5 minutes before mixing with oil. The key is pressing them firmly into the cheese sauce so they stick during baking.
How do I fix a runny sauce?
If the sauce is too thin, remove from heat and stir in 1-2 tablespoons of flour or pasta water to thicken. For a richer texture, add a splash of heavy cream or whole milk. Avoid overcooking the roux—burnt flour makes the sauce grainy. The sauce should coat the back of a spoon but still be smooth.