Side Dishes
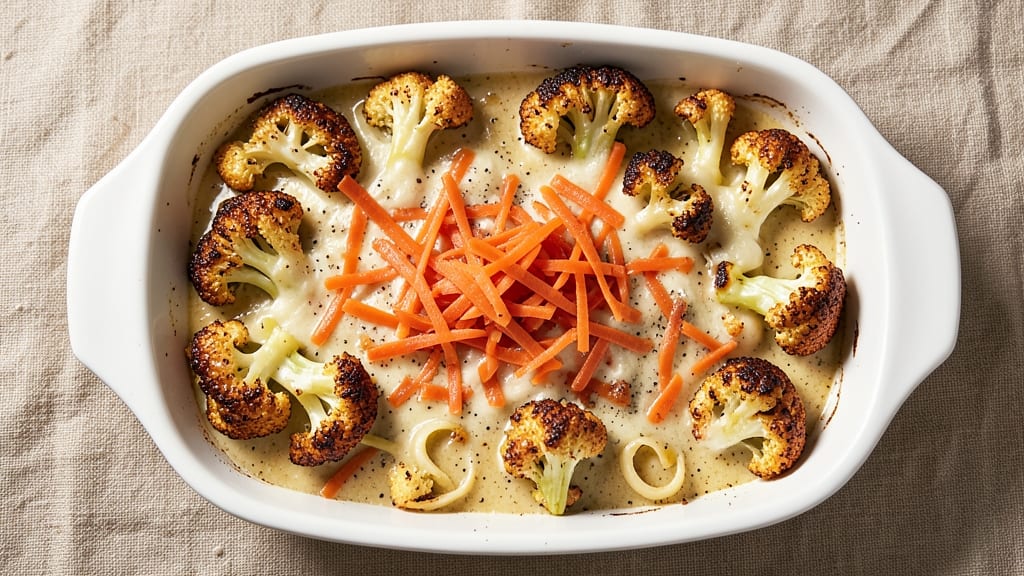
When you crave a baked cauliflower and cheese recipe that delivers crispy golden edges and bubbly cheese swirls, this method is the answer. I developed it after testing countless variations to find the perfect balance of texture and flavor—no soggy middles or bland cheese here.
The secret lies in pre-roasting the cauliflower until tender yet firm, then layering it with sharp cheddar and a touch of creaminess that transforms into golden, caramelized perfection.
This recipe works as a standalone vegetarian main or a hearty side dish, especially when paired with proteins like chickpeas or tofu. The process is straightforward: cut the cauliflower into even florets, roast them until just tender, then top with a foolproof cheese mixture that melts into irresistible swirls.
Baking at 375°F ensures the top gets beautifully crispy while keeping the interior creamy and rich.
What you’ll end up with is a dish that looks as impressive as it tastes—golden, bubbly, and crispy at the edges with pockets of melted cheese throughout. The aroma alone will have everyone gathering around the table, and the texture combination (crunchy top, creamy center) makes it impossible to resist.
This is comfort food at its finest, perfect for weeknight dinners or special occasions.
For extra flavor, sprinkle with breadcrumbs or herbs before baking, or add a dash of garlic powder to the cheese mixture. The possibilities are endless, but the foundation remains the same: tender cauliflower, rich cheese, and that crispy top everyone will love. Let’s get baking!
Ingredients for baked cauliflower and cheese
Tender cauliflower florets meet rich, bubbly cheese for a crispy, golden masterpiece.
| Ingredient | Amount | Notes |
|---|---|---|
| Fresh Cauliflower 🥬 | 1 whole | Cut into even florets |
| Sharp White Cheddar Cheese 🧀 | 2 cups | Freshly grated, block preferred |
| Extra-Sharp Cheddar Cheese 🧀 | 1 cup | For deeper flavor |
| Heavy Cream 🥛 | ½ cup | Full-fat for richness |
| Extra-Virgin Olive Oil 🫒 | 2 tbsp | For roasting cauliflower |
| Diamond Crystal Kosher Salt 🧂 | 1 tsp | For seasoning |
| Freshly Ground Black Pepper 🌶️ | ½ tsp | Freshly cracked preferred |
| Garlic Powder 🧄 | ½ tsp | For cheese mixture |
| Dried Thyme 🌿 | ¼ tsp | Or 1 tbsp fresh thyme |
| Panko Breadcrumbs 🍞 | ¼ cup | For crispy topping |
| Freshly Grated Parmesan Cheese 🧀 | ¼ cup | For extra flavor |
| Vegetable Broth 💧 | ¼ cup | For moisture and flavor |
| Unsalted Butter 🧈 | 1 tbsp | Melted for brushing |
The cauliflower is the star here—look for a fresh head with tight florets and no yellowing. Whole Foods or your local market usually carry the best quality. If you're prepping ahead, cut the florets into even sizes (about 1.5 inches) so they cook uniformly. The cheese matters too—sharp white cheddar gives that perfect tang, while extra-sharp adds depth. I always grab block cheese from the deli counter and grate it myself; pre-shredded gets clumpy and lacks flavor. For the panko, Trader Joe's has the best-priced, high-quality stuff—it's worth the extra minute to toast it lightly in a dry pan before using.
No sharp cheddar? Pepper jack or Gruyère work in a pinch, though the flavor profile changes. Heavy cream can be swapped for half-and-half if you're watching fat, but trust me on the full-fat version—it makes the cheese swirls silky. Fresh thyme is ideal, but dried at one-third the amount gets you close. For extra crunch, toss in crushed cornflakes instead of panko. The vegetable broth adds moisture without overpowering—low-sodium is best—and if you're feeling fancy, add a splash of white wine to the cheese mixture. The butter for brushing? European-style if you can find it—it has a higher fat content that makes the top extra crispy.
Prepped cauliflower florets keep in the fridge for 2 days if stored in an airtight container. The cheese mixture can be made ahead and refrigerated for 1 day, but let it sit at room temperature for 10 minutes before baking to prevent condensation. Leftovers reheat beautifully—just cover with foil and warm at 350°F for 10 minutes. I always make a double batch because this disappears fast. Store any extras in the fridge for 4 days or freeze for 3 months—it reheats like a dream.
Why You'll Love This Recipe
- One-Pan Magic: I swear by this recipe when I’m too tired to scrub pots—just toss the cauliflower florets on a sheet pan, drizzle them with olive oil, and let the oven do the work. The heavy cream and cheddar blend into a golden, bubbly crust that practically melts in your mouth.
- Sharp Cheese Obsession: That combo of sharp white and extra-sharp cheddar? It’s what turns this from good to ridiculously good. The sharpness cuts through the creaminess, and the caramelized edges? Absolute perfection. (Yes, I’ve been known to eat it straight from the pan.)
- Leftover Heaven: This dish reheats like a dream—crispy on top, creamy underneath—and keeps for days in the fridge. Honestly, I make a double batch on Sundays because it’s my go-to for lazy lunches or when I need a quick protein boost without the fuss.
- Budget-Friendly Luxury: Cauliflower and cheese are cheap, but this tastes like a fancy dinner. Between us, I’ve served this at potlucks, game nights, and even as a side for Thanksgiving—no one ever guesses it’s not a restaurant dish. (My secret weapon.)
Step-by-step instructions for baked cauliflower and cheese recipe
Here's how to achieve that perfect crispy top with bubbly cheese swirls every time.
Prep and Roast the Cauliflower
Preheat your oven to 425°F and line a baking sheet with parchment paper. Cut the whole fresh cauliflower into even florets, discarding the tough core. In a large bowl, toss the florets with 2 tablespoons extra-virgin olive oil, ½ teaspoon freshly ground black pepper, and ½ teaspoon garlic powder until they're evenly coated.
Spread the cauliflower in a single layer on the prepared baking sheet, leaving space between each floret. Roast for 15-18 minutes until the edges begin to brown and the cauliflower feels tender when pierced with a fork. This initial roast develops flavor and ensures the cauliflower stays moist during baking. Don't skip this step—it's what creates that perfect texture contrast later.
Make the Cheese Mixture
While the cauliflower roasts, reduce the oven temperature to 375°F. In a medium bowl, combine 2 cups freshly grated sharp white cheddar cheese, 1 cup extra-sharp cheddar cheese, ½ cup heavy cream, ½ teaspoon dried thyme, 1 teaspoon diamond crystal kosher salt, and an additional ½ teaspoon freshly ground black pepper. Mix until completely smooth, scraping the bowl to ensure no dry cheese remains.
This mixture is the heart of your dish—the blend of sharp white and extra-sharp cheddar creates depth of flavor, while the heavy cream adds richness. The thyme and extra pepper ensure every bite has balanced seasoning. If the mixture looks too thick, add 1-2 tablespoons vegetable broth to help it spread more easily later.
Assemble and Bake the Casserole
Return the roasted cauliflower to the baking sheet and spread the cheese mixture evenly over the top, pressing down gently to create a smooth layer. The cauliflower should be completely covered—this ensures maximum contact for that perfect cheesy crust. Sprinkle ¼ cup freshly grated parmesan cheese and ¼ cup panko breadcrumbs evenly over the top for extra flavor and texture.
Bake for 15-20 minutes until the cheese is fully melted and the top begins to turn golden brown. Watch closely during the last 5 minutes—you want that crispy crust without burning. If the top browns too quickly, tent loosely with foil to prevent over-browning while still allowing the cheese to bubble.
Finish with Melted Butter for Extra Crispiness
Remove the casserole from the oven and immediately brush the top with 1 tablespoon melted unsalted butter using a pastry brush. This step is what transforms your dish from good to exceptional—it creates that signature crispy, golden-brown crust that everyone will rave about. Return to the oven for 2-3 minutes just to set the butter and enhance the browning.
Let the baked cauliflower rest for 5 minutes before serving—this allows the cheese to set slightly and makes slicing easier. The interior should be bubbly and gooey, while the exterior remains crispy enough to hold its shape. Serve immediately while the cheese is still hot and melty, with a side of crusty bread to soak up any extra cheese sauce.
Pro Tips For Making Baked Cauliflower And Cheese
- Preheat Like It’s 1985: Your oven’s preheat light isn’t a suggestion—it’s a non-negotiable. I used to skip this with my first batches, and the cheese ended up greasy instead of golden. 425°F (220°C) is your target, and give it 15 minutes to even out. That extra heat makes the cauliflower crisp where it touches the pan, not soggy.
- Shred Cheese Like a Pro: Skip the food processor—it turns sharp cheddar into glue. Use your hands or a box grater for uneven shreds, and mix the sharp white and extra-sharp cheddar by hand. The texture matters: fine shreds melt into a paste, while larger pieces hold their shape and give that perfect pull-apart bite.
- Don’t Crowd the Pan: I learned this the hard way—packing cauliflower florets too tightly means steam instead of crisp edges. Leave ½-inch gaps between them, or bake in batches. The air needs room to circulate, or you’ll end up with a sad, damp casserole instead of a cheesy masterpiece.
- Whisk the Cream Cold: Heavy cream straight from the fridge whips into a smoother sauce and cuts through the sharpness of the cheese. Warm it slightly first (just enough to coat a spoon), then stir it into the cheese mix. Cold cream also prevents the sauce from curdling—trust me, you’ll taste the difference.
Make-ahead tips for baked cauliflower and cheese
Prep Ahead Like a Pro
Cut your cauliflower florets and store them in an airtight container with a sprinkle of ½ teaspoon salt and 1 tablespoon olive oil. They’ll keep in the fridge for 2 days—just toss them with the full seasoning before roasting.
This saves time and ensures even cooking. I always prep mine the night before so I can focus on the cheese mixture in the morning. 💪
Cheese Mixture Prep
Make the cheese mixture the night before and refrigerate it in a sealed container. When ready to bake, let it sit at room temperature for 10 minutes to soften slightly—this prevents condensation that can make the top soggy.
I’ve found that pre-shredded cheese doesn’t work well here, so grating your own is worth the effort. If you’re short on time, blend 1 cup sharp cheddar with 2 tablespoons heavy cream in a food processor for a smoother texture. ✨
Double Batch for Leftovers
This dish reheats beautifully, so I always make double the recipe. Store leftovers in the fridge for 4 days or freeze for 3 months—just cover tightly with foil and reheat at 350°F for 10 minutes.
For extra crispiness, broil for 2-3 minutes at the end. The cheese stays gooey, and the top gets that satisfying crunch again. Perfect for meal prep! 🍽️
Freezer-Friendly Assembly
Assemble the entire casserole on a baking sheet, cover tightly with plastic wrap, and freeze for up to 3 months. When ready to bake, thaw overnight in the fridge, then bake as directed but add 5 extra minutes to the final baking time.
The texture stays just as good as fresh—no freezer burn in sight. I’ve even prepped this for holiday gatherings and had rave reviews. 💫
Make-Ahead Serving Ideas
Use this as a base for breakfast hash the next day—slice and pan-fry with eggs and crispy potatoes. Or turn it into a grilled cheese sandwich by adding a slice of bread and melting it in a pan.
The possibilities are endless, and the leftovers always taste even better the second time around. Keep a small container in your fridge for quick lunches or snacks. 🌟
Equipment Shortcuts
No food processor? No problem. Use a microwave-safe bowl to melt the cheese with the heavy cream for 30 seconds, then stir until smooth. For extra crispiness, toast your panko breadcrumbs in a dry skillet over medium heat for 2-3 minutes before sprinkling on top.
These small tweaks make ahead prep even easier without sacrificing flavor. 🔥
Nutrition facts
Frequently asked questions
Can I use pre-shredded cheese in this recipe?
Pre-shredded cheese works in a pinch, but freshly grated cheese gives the best results. The anti-caking agents in pre-shredded cheese can make the sauce grainy and prevent that perfect creamy texture. If you must use it, choose a block cheese and grate it yourself for the smoothest consistency.
How do I keep the cauliflower from getting soggy?
The secret is pre-roasting the cauliflower until tender but still firm before adding the cheese. This ensures it holds its shape and doesn't absorb too much moisture from the melted cheese. Also, don't overmix the cheese mixture—just combine until smooth to avoid releasing excess liquid.
Can I make this dish ahead of time?
Assemble the casserole, cover tightly with foil, and refrigerate for up to 24 hours before baking. For make-ahead freezing, assemble on a baking sheet, wrap tightly, and freeze for up to 3 months. Thaw overnight in the fridge before baking. The texture stays just as good as fresh.
What's the best cheese substitute if I don't have cheddar?
Try Gruyère or Pepper Jack for a similar melt and flavor profile. For a dairy-free option, use a mix of nutritional yeast and cashew cream (blended soaked cashews with water). Just reduce the liquid in the mixture to compensate for the cashew cream's moisture.
Why did my top get rubbery instead of crispy?
Rubbery tops usually happen from overmixing the cheese or not brushing with butter at the end. Make sure your cheese mixture is smooth but not liquidy, and always finish with melted butter for that golden crust. If it happens, broil for 1-2 minutes at the end to restore crispiness.