Appetizers
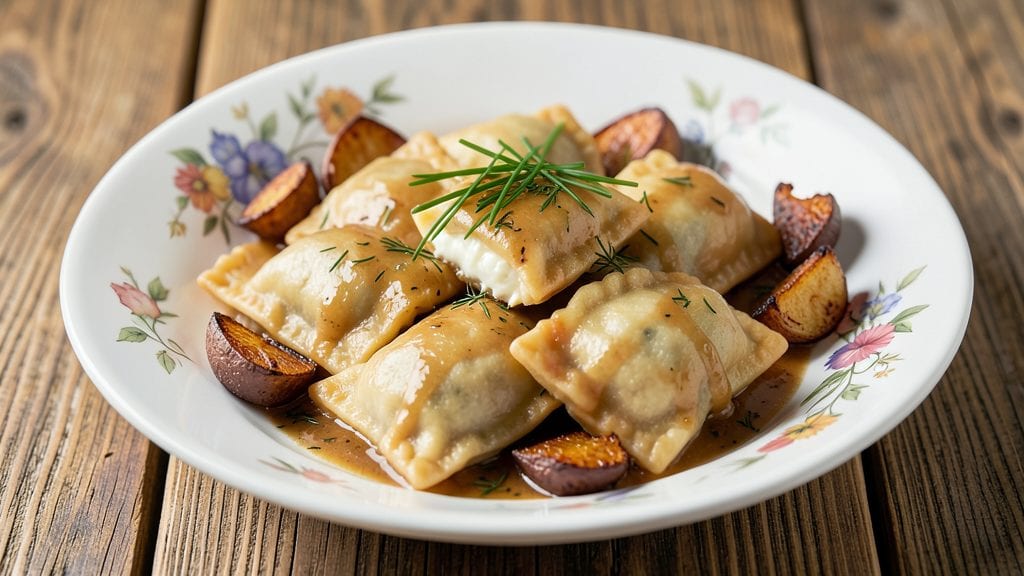
This cheese pierogi recipe delivers the perfect balance of tender dough and golden, crispy edges—every bite is a taste of Eastern European comfort. The secret lies in a precise dough-to-filling ratio and a pan-frying technique that transforms boiled pierogi into irresistible golden dumplings.
I’ve perfected this method over years of testing, ensuring the filling stays creamy while the crust achieves that satisfying crunch. 🌟
The traditional filling of farmer’s cheese, potatoes, and onions creates a rich, savory center that pairs beautifully with the crispy exterior. Making pierogi from scratch might seem intimidating, but with a few key techniques—proper dough handling, tight sealing, and careful boiling—you’ll achieve restaurant-quality results at home.
The dough is simple to prepare with just flour, water, egg, and salt, while the filling comes together in minutes.
Once boiled and pan-fried to a golden brown, these pierogi become a crispy, flavorful masterpiece. Served with a dollop of sour cream and a sprinkle of fried onions, they’re a complete dish that feels both nostalgic and refined.
Whether you’re serving a crowd or enjoying a cozy meal, this recipe delivers the heartwarming magic of homemade pierogi.
For those new to pierogi, don’t worry—this method is foolproof, and I’ll guide you through every step, from shaping to frying, so you can achieve that perfect crispy crust every time. Let’s get started!
Ingredients for cheese pierogi
Flour, cheese, and potatoes—just 12 ingredients for golden, crispy pierogi magic.
| Ingredient | Amount | Notes |
|---|---|---|
| All-Purpose Flour 🌾 | 3 cups | Sifted for light texture |
| Large Eggs 🥚 | 1 whole | Room temperature preferred |
| Water 💧 | 1 ¼ cups | Cold for elasticity |
| Salt 🧂 | ½ tsp | Fine sea salt preferred |
| Farmer's Cheese 🧀 | 1 ½ cups | Or substitute ricotta |
| Russet Potatoes 🥔 | 2 whole | Peeled, cooked and mashed |
| Yellow Onion 🧅 | 1 whole | Finely diced |
| Butter 🧈 | 2 tbsp | Unsalted, softened |
| Sour Cream 🥛 | ¼ cup | Full-fat for creaminess |
| Fried Onions 🧅 | ¼ cup | Store-bought or homemade |
| Vegetable Oil 🫒 | 1 ½ cups | For pan-frying |
| Allspice 🌶️ | ¼ tsp | Ground, optional |
The farmer’s cheese is non-negotiable for that classic pierogi taste, but ricotta works in a pinch—just add a splash of milk to thicken it. Whole Foods or specialty stores carry the best farmer’s cheese, but Costco has a solid bulk option too. For the potatoes, Russets are key—they mash smooth and don’t turn gummy. If you’re using store-bought mashed potatoes, grab the no-skin, no-lumps kind from the refrigerated section. The onions? Sweet yellows add natural sweetness, but red onions work if that’s what’s on hand.
No farmer’s cheese? Cottage cheese blended smooth gets you close—strain it first to avoid lumps. Short on allspice? Cinnamon at half the amount adds warmth without overpowering. The dough needs to be just slightly sticky—add a splash more water if it crumbles. For the filling, squeeze excess moisture from the potatoes before mixing, or your pierogi will turn soggy. The fried onions? Trader Joe’s has the best pre-fried kind—no need to make them from scratch unless you’re feeling ambitious.
Pierogi dough keeps 2 days wrapped in plastic in the fridge, or 3 months frozen between parchment. The filling can be prepped ahead too—just store it in a sealed container. For frying, keep the oil at 350°F—too hot and they burn, too cool and they stay soggy. I like to freeze cooked pierogi on a tray first, then transfer to a bag for easy portioning. Reheat in a skillet or air fryer for that crispy texture.
Why You'll Love This Recipe
- Five-Ingredient Magic: I swear by this—just flour, eggs, water, salt, and that rich farmer’s cheese. No fancy pantry trips, no confusing ratios. The dough comes together faster than boiling water, and the filling? Just mix, fold, and go.
- Creamy Cheese Bliss: That tender farmer’s cheese filling—salty, smooth, and just soft enough—melts into pure comfort with every bite. No weird aftertaste, no gummy texture. It’s the kind of simple that feels luxurious.
- Potluck Proven: Between us, these are my potluck MVP. Freeze half the batch, dump them in boiling water at the party, and watch people line up. Works for picnics, game days, or even a lazy Sunday when you’re not feeling fancy.
- Zero-Waste Feast: Make a double batch, freeze extras, and thank me later. They reheat like a dream—no soggy bottoms, no sad leftovers. And honestly? Farmer’s cheese is cheaper than most store-bought fillings, so you’re saving money while feeding a crowd. Win-win.
Step-by-step instructions for cheese pierogi recipe
Here's how to make these pillowy, golden-brown pierogi with a crispy crust every time.
👨🍳 Step 1: Make the Dough with Perfect Elasticity
In a large mixing bowl, combine the 3 cups all-purpose flour and 0.5 tsp salt. Make a well in the center and add the 1 whole large egg and 1.25 cups cold water. The cold water is key—it keeps the dough from developing too much gluten and makes it tender.
Using a wooden spoon or your hands, gradually mix the ingredients until a shaggy dough forms. Once it comes together, turn it out onto a lightly floured surface and knead gently for about 3-4 minutes until smooth. You're looking for a soft, slightly tacky dough that doesn't stick to your hands. If it feels too dry, add 1 tsp water at a time until it's just right.
Wrap the dough in plastic wrap and let it rest for 30 minutes at room temperature. This resting period relaxes the gluten, making it easier to roll out later. I like to place it in the fridge while I prep the filling—it keeps the dough cool and prevents it from drying out.
🥘 Step 2: Prepare the Cheesy Potato Filling
While the dough rests, peel and boil the 2 whole russet potatoes until fork-tender. Drain well and mash them until completely smooth—no lumps! In a separate bowl, combine the mashed potatoes with 1.5 cups farmer's cheese, 0.25 cup sour cream, 0.25 cup fried onions, and 0.25 tsp allspice. Mix until fully incorporated and season with additional salt if needed.
Here's the thing—this filling needs to be cool before you shape the pierogi. If it's too warm, the dough will soften and get sticky. Spread the filling mixture on a plate and refrigerate for 15-20 minutes while you prepare the dough rolling setup. The cooler filling makes for cleaner, neater pierogi shapes.
🍳 Step 3: Roll and Cut the Dough
Divide the rested dough into 4 equal pieces and roll each piece into a thin rectangle about 1/8-inch thick on a lightly floured surface. I use a rolling pin, but you can also use a pasta machine if you have one. The goal is even thickness—this ensures all your pierogi cook at the same rate.
Using a 3-inch round cutter (or a glass of that size), cut circles from the rolled dough. Place 1 tbsp of the cooled filling in the center of each circle. Fold the dough over the filling to form a half-moon shape, then pinch the edges tightly to seal. I like to use a fork to crimp the edges—it gives that classic decorative look.
Place the sealed pierogi on a floured surface and cover with a damp towel to prevent drying. Work in batches—don't make them all at once or they'll dry out before you can cook them. You should have about 16-18 pierogi depending on how generous you are with the filling.
🔥 Step 4: Pan-Fry to Golden Perfection
Heat 1.5 cups vegetable oil in a large skillet over medium heat until it reaches 350°F—use a thermometer for accuracy. Carefully add the pierogi in batches (don't overcrowd) and fry for 2-3 minutes per side until they're golden brown and crispy. The oil should be hot enough to sizzle but not smoke excessively.
Here's where the magic happens: as they fry, the pierogi will puff up slightly. You'll know they're done when the bottoms are deep golden brown and the tops are set. Use a slotted spoon to transfer them to paper towels to drain excess oil. Keep them warm in a 200°F oven while you fry the remaining batches.
For extra richness, melt the 2 tbsp butter in a separate pan over low heat. Once the butter is foamy but not browned, add the fried pierogi and toss gently to coat with the buttery goodness. Serve immediately with extra fried onions sprinkled on top and a dollop of sour cream on the side.
Pro Tips For Making Cheese Pierogi
- CHILL THE DOUGH: After mixing your dough, pop it in the fridge for at least 30 minutes—no, longer isn’t cheating. I used to skip this and ended up with pierogi that flattened like pancakes when boiling. Cold dough holds its shape and seals better, so your cheese stays put.
- PRESS CHEESE DRY: Drain your farmer’s cheese in a fine-mesh strainer for 10 minutes before mixing. The less moisture, the less your dough gets soggy. I learned this the hard way when my first batch turned into gluey dumplings—now I always squeeze it dry like I’m wringing out a dish towel.
- BOIL IN BATCHES: Don’t overcrowd your pot—aim for 12-15 pierogi at a time, or they’ll stick together like sad, doughy clumps. Use a slotted spoon to gently nudge them apart if needed. Trust me, your future self will curse you if you ignore this.
- TOAST THEM RIGHT: After boiling, spread pierogi on a baking sheet and broil for 2-3 minutes—watch like a hawk. You want golden spots, not charred hockey pucks. A sprinkle of flour on the sheet keeps them from sticking, and a pinch of salt while they toast? Game-changer.
Flavor customization for this dish
Classic Cheese Variations
Stick with the traditional farmer’s cheese for that authentic Eastern European taste, but don’t fear substitutions. Ricotta works beautifully—just mix it with a splash of milk to loosen it. For a tangier twist, blend cottage cheese (strained smooth) with a pinch of black pepper and dill.
I’ve even made a goat cheese version by mixing ½ cup crumbled goat cheese with the standard filling—it adds a bright, slightly tangy note that pairs perfectly with the crispy crust. 🧀
Savory Add-Ins
Boost the filling with caramelized onions for natural sweetness—simmer 1 cup finely diced onion in 1 tbsp butter and 1 tbsp sugar until golden. Add 1-2 tbsp chopped chives or green onions for freshness.
For a smoky depth, stir in ½ tsp smoked paprika or crumbled bacon bits. I love adding 1 tbsp crumbled feta to the mix for a briny contrast that elevates the dish. 🧅
Spicy Kick Options
For heat lovers, fold ½ tsp cayenne pepper or 1 tsp hot paprika into the filling. For a milder but still spicy option, mix in 1 tbsp finely chopped jalapeños or ½ tsp chipotle powder.
If you prefer a smoky heat, add ½ tsp chipotle in adobo (blended smooth) to the filling. Serve with sriracha or hot honey on the side for extra kick. 🌶️
Sweet & Herby Twists
Balance the richness with 1 tbsp finely chopped fresh dill or parsley for brightness. For a subtle sweetness, add 1 tbsp grated apple or carrot to the filling. A lemon zest twist (½ tsp) brightens the flavor profile beautifully.
For a dessert-inspired variation, mix in ½ cup mashed sweet potato and 1 tsp cinnamon—these become a perfect breakfast pierogi when pan-fried and topped with maple syrup. 🍎
Vegetarian & Vegan Adaptations
Swap the cheese for tofu ricotta (blended silken tofu with lemon juice and salt) or nutritional yeast for a cheesy flavor without dairy. Use mashed cauliflower instead of potatoes for a lower-carb option. For vegan butter, Miyoko’s or Earth Balance work well for pan-frying.
The dough can be made vegan by using flax eggs (1 tbsp ground flax + 3 tbsp water per egg) and vegetable oil instead of butter. 🌱
Nutrition facts
Frequently asked questions
Can I make the dough ahead of time?
The dough keeps well in an airtight container for 2 days in the fridge or 3 months in the freezer. Just thaw it at room temperature before rolling, and add 1 tsp water if it feels dry. This is perfect for prep-ahead meals—make the dough first, then assemble and cook the pierogi when you're ready.
Why did my pierogi fall apart when boiling?
This usually happens when the dough isn't properly sealed or the filling is too wet. Make sure to pinch the edges tightly with a fork, and squeeze out excess moisture from the mashed potatoes before mixing. If the dough feels too dry, add 1 tsp water while kneading. For extra security, boil them in batches and avoid overcrowding the pot.
What's the best way to reheat leftover pierogi?
For crispy results, pan-fry them in 1 tbsp butter or vegetable oil over medium heat for 2-3 minutes per side until golden. If you prefer a softer texture, steam them in a covered pot with 1 cup water for 5-7 minutes. Microwaving works in a pinch, but they won't be crispy. Always reheat from room temperature for even cooking.
Can I make these pierogi without a rolling pin?
Yes! If you don't have a rolling pin, use a heavy pan or even a bottle to roll out the dough. Press firmly with even pressure to get that 1/8-inch thickness. For extra precision, fold the dough over a few times and press with your hands to flatten it. A pasta machine works too, but the manual method gives you full control over the thickness.
How do I serve cheese pierogi for a crowd?
Double the recipe and set up an assembly line: one person rolls dough, another fills and seals, and a third boils or fries. Keep cooked pierogi warm in a 200°F oven while you finish. For serving, arrange them on a platter with sour cream, fried onions, and caramelized onions in bowls. Add a side of pickled vegetables or a simple green salad to balance the richness.